Set Up Your Personal AI Assistant with OpenClaw
Get an AI coworker in your Slack that learns about you, searches the web, and works with any model you choose.
OpenClaw (formerly ClawdBot / Moltbot) is taking the internet by storm. It's an open-source AI assistant that runs on your own computer: private, powerful, and completely under your control.
OpenClaw is incredibly flexible. You can connect it to different AI providers, integrate it with various chat platforms, and configure it in dozens of ways. That flexibility is great for developers, but it can be overwhelming if you just want something that works.
That's why I created this (opinionated) setup package that makes OpenClaw dead simple to get running. With my configuration, you get:
- Model flexibility via OpenRouter. Switch between Claude, ChatGPT, Gemini, Grok, and dozens of other AI models on the fly (including recently released models), all through a single API key.
- Slack as your interface. Chat with your AI assistant right where you already work, instead of juggling another app.
- Simple scripts. Start, stop, and update with simple, singular commands.
- All local and secure. Your conversations and files stay on your computer. Only you can talk to the bot.
This guide walks you through the entire setup in about 30 minutes.
What You'll Have When You're Done
By the end of this guide, you'll have a personal AI assistant living in your Slack, like having a knowledgeable coworker who's always available.
Your assistant will:
- Learn about you over time. It remembers context from your conversations.
- Access the latest AI models. Claude, ChatGPT, Gemini, and more, with the ability to switch anytime.
- Search the web on your behalf to find current information.
- Work with your files (optional). Give it access to specific folders on your computer so it can read, analyze, or help you edit documents.
You'll interact with it through Slack direct messages, just like chatting with a colleague.
Prerequisites
Before we begin, here's what you need:
- A computer running Mac or Windows
- A Slack workspace where you have permission to add apps
- Docker Desktop installed and running, see instructions below
- An OpenRouter API key, see instructions below
No coding experience required. I'll explain everything as we go.
Install Docker Desktop
Docker runs OpenClaw in an isolated container on your computer, like a secure sandbox.
- Download and install Docker Desktop:
You'll need to create a free Docker account during installation. The install process takes about 5-10 minutes. - Open Docker Desktop and accept the license agreement
- Verify it's running: look for a whale icon in your menu bar (Mac) or system tray (Windows). If the whale is animating, Docker is still starting. Wait for it to settle.
Set Up OpenRouter
OpenRouter is your gateway to AI models. Instead of signing up separately with OpenAI, Anthropic, and Google, one OpenRouter account unlocks them all. You pay only for what you use, typically pennies per conversation.
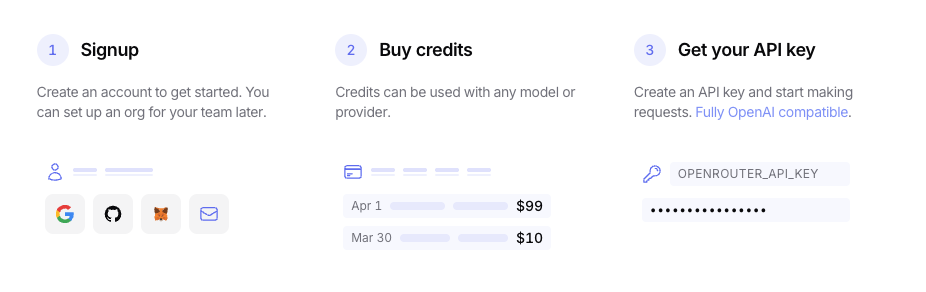
- Sign up at openrouter.ai
- Add credits at openrouter.ai/settings/credits ($5-10 will last a long time)
- Create an API key at openrouter.ai/settings/keys. Give it a name like "OpenClaw" and copy it immediately. It starts with
sk-or-and you'll only see it once.
Save your API key somewhere safe. You'll need it shortly.
Browse available models: ChatGPT | Claude | Gemini | All models
Download the Project
Download openclaw-docker.zip
(Technical users: the GitHub repository is available if you prefer to clone it.)
Extract and Place the Files
- Find the downloaded ZIP file and extract it
- You'll get a folder called
openclaw-docker-main. Rename it toopenclaw-docker - Move the folder somewhere permanent:
- Mac: Your home folder (e.g.,
/Users/YourName/openclaw-docker) - Windows: Your user folder (e.g.,
C:\Users\YourName\openclaw-docker)
- Mac: Your home folder (e.g.,
Set Up the Project
Now we'll configure everything before running the setup scripts.
Create and Open Your Configuration File
- Open your
openclaw-dockerfolder - Find the file called
.env.example- Mac: Files starting with
.are hidden by default. PressCmd+Shift+.to show hidden files. - Windows: Files starting with
.may be hidden. In File Explorer, click View → Show → Hidden items.
- Mac: Files starting with
- Make a copy of it and rename the copy to
.env - Open the
.envfile in a text editor (Notepad on Windows, TextEdit on Mac)
This file stores your API key and Slack tokens. Keep it open - we'll add values as we go.
The .env file is a list of name-value pairs. The left side of each line is the name of a setting, and the right side (everything after the = sign) is the value. You'll only ever change the value side - the right side of the equal sign. Leave the names on the left side exactly as they are.
Add Your OpenRouter API Key
In your .env file, find this line:
OPENROUTER_API_KEY=sk-or-your-key-here
Replace sk-or-your-key-here with your OpenRouter API key. The name OPENROUTER_API_KEY stays the same - you're only replacing the value after the =.
Also find the Slack section (the lines may be commented out with #, so remove the #):
SLACK_APP_TOKEN=xapp-your-token-here
SLACK_BOT_TOKEN=xoxb-your-token-here
SLACK_ALLOWED_USERS=YOUR_MEMBER_ID
We'll fill these in as we create the Slack app.
Create a Slack App
- Go to api.slack.com/apps
- Click Create New App
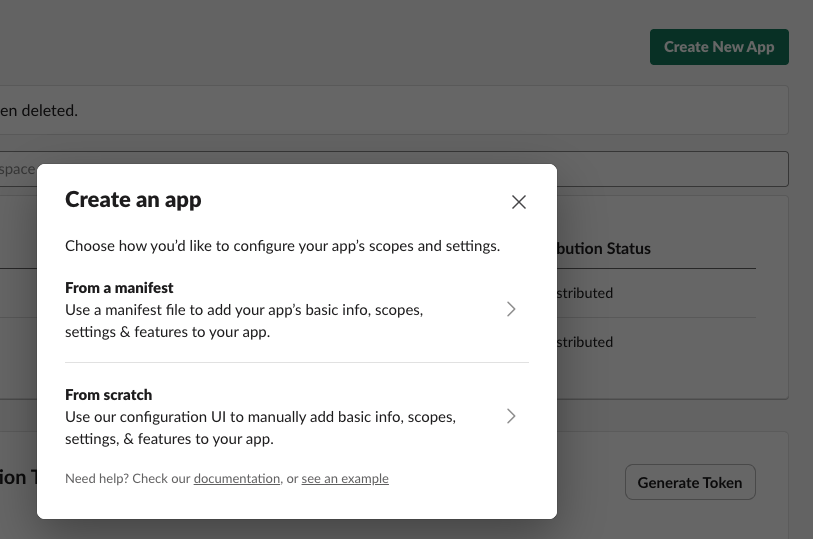
- Choose From an app manifest
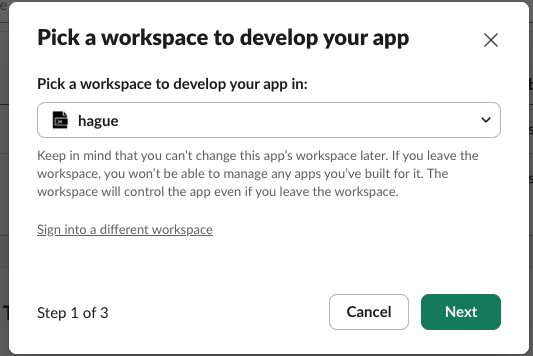
- Select your Slack workspace and click Next
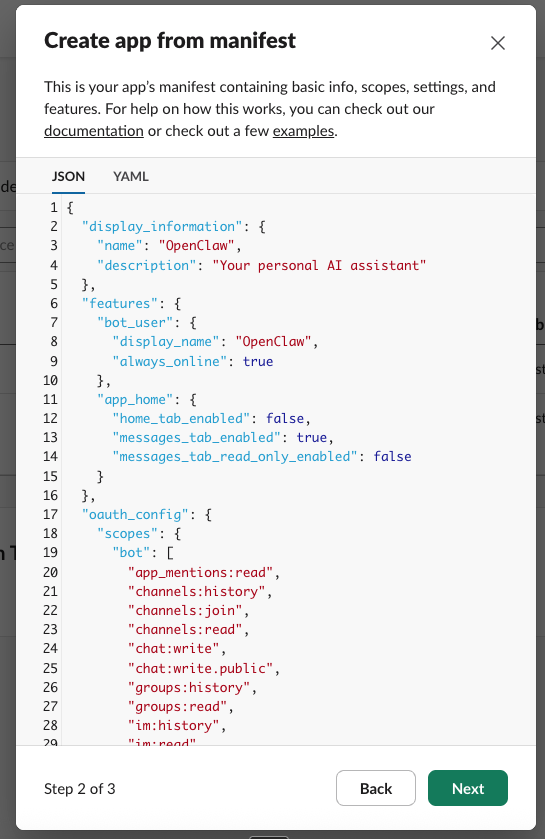
- Delete everything in the manifest editor
- On your computer, open the
slack-manifest.jsonfile from your openclaw-docker folder - Copy the entire contents and paste it into the manifest editor
- (Optional) Here you can name your slack bot if you prefer something other than "OpenClaw" - simply update "name" and "display_name"
- Click Next
- Review summary for the app and click Create
Get Your App Token
- You should be on your app's Basic Information page
- Scroll down to App-Level Tokens
- Click Generate Token and Scopes
- Name it "Socket"
- Click Add Scope and select
connections:write - Click Generate
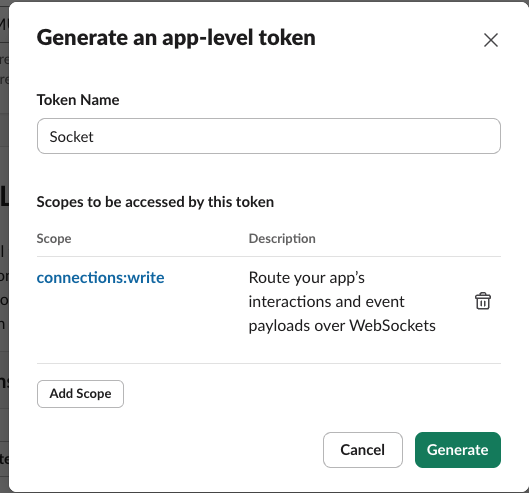
- Copy the token that appears (starts with
xapp-)
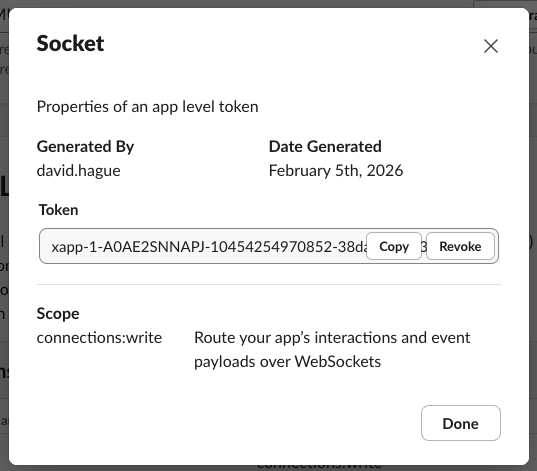
- Paste it into your
.envfile as the value forSLACK_APP_TOKEN
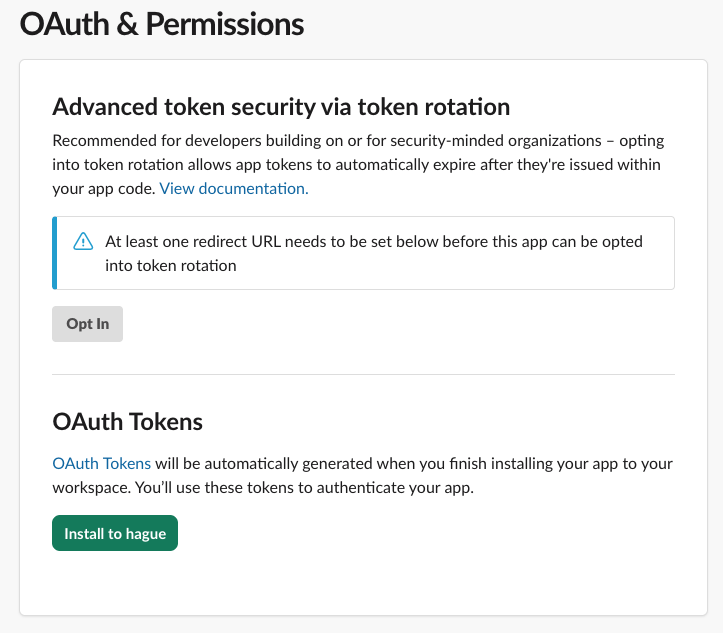
Install the App and Get Your Bot Token
- In the left sidebar, click Install App
- Click Install to Workspace
- Review the permissions and click Allow
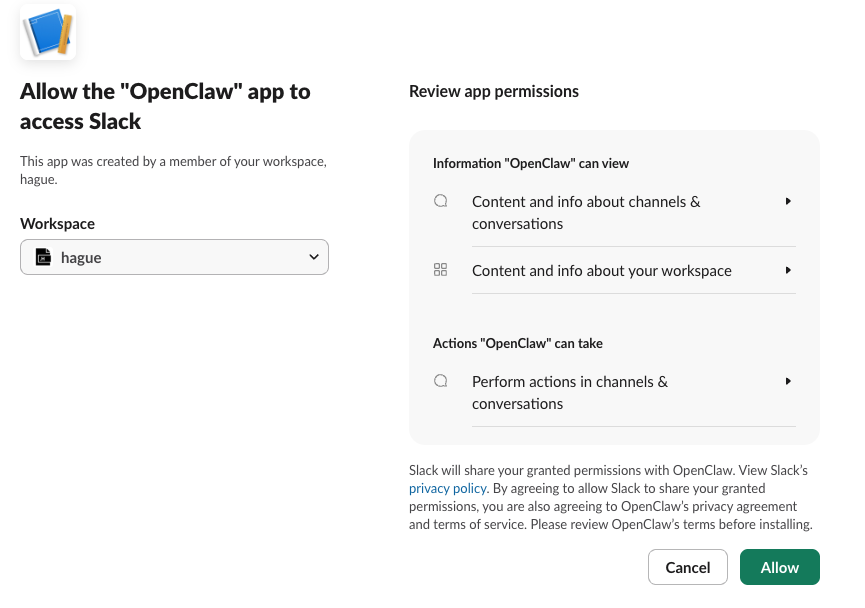
- Copy the Bot User OAuth Token (starts with
xoxb-)
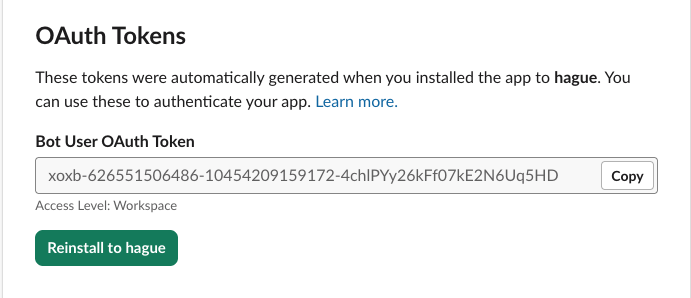
- Paste it into your
.envfile as the value forSLACK_BOT_TOKEN
Find Your Slack User ID
Now switch over to the actual Slack app on your computer (not the Slack website where we were setting up the app).
This lets you DM your bot without an approval process:
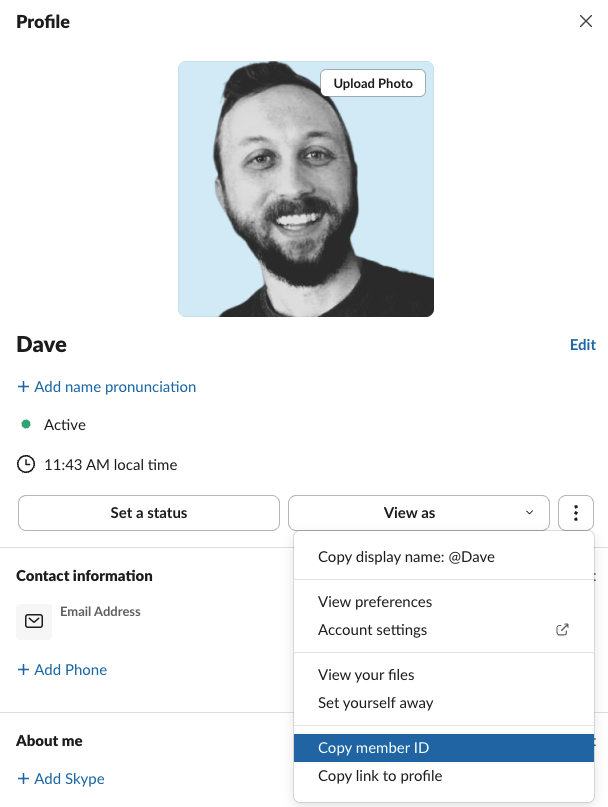
- In Slack, click on your own profile picture
- Click Profile
- Click the three dots ⋮ menu
- Click Copy member ID
- Paste it into your
.envfile as the value forSLACK_ALLOWED_USERS - Make sure all Slack lines are uncommented by removing the
#and spaces at the front of the line (see screenshot below) - Save and close the
.envfile

Run the Setup
Now we need to run some commands. You can click the copy icon on any code block to copy commands to your clipboard.
Open a Terminal
Mac:
- Open Terminal (find it in Applications → Utilities, or search with Spotlight)
- Drag your
openclaw-dockerfolder onto the Terminal icon in the Dock, or typecd(with a space) and drag the folder into the Terminal window, then press Enter
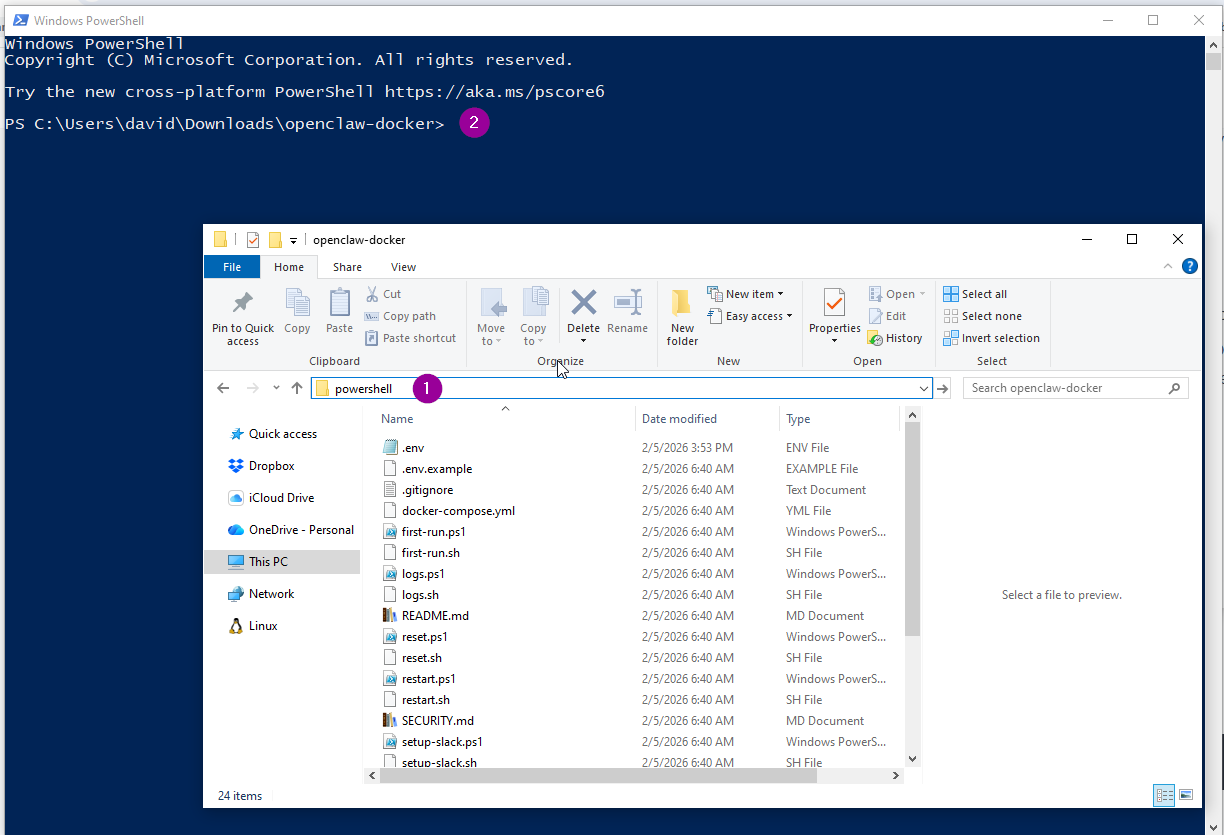
Windows:
- Open File Explorer and navigate to your
openclaw-dockerfolder - Click in the address bar at the top
- Type
powershelland press Enter
Windows note: If you see "running scripts is disabled", open PowerShell (right-click Start > Windows PowerShell, or search for it), navigate to your openclaw-docker folder, and run these commands one at a time:
Set-ExecutionPolicy Bypass -Scope Process
.\first-run.ps1
The first command bypasses the script execution policy just for this session, so the setup script can run normally. If this doesn't work, you can instead try setting a permanent policy by running PowerShell as Administrator and entering:
Set-ExecutionPolicy -ExecutionPolicy RemoteSigned -Scope CurrentUser
Then close and reopen PowerShell in your openclaw-docker folder.
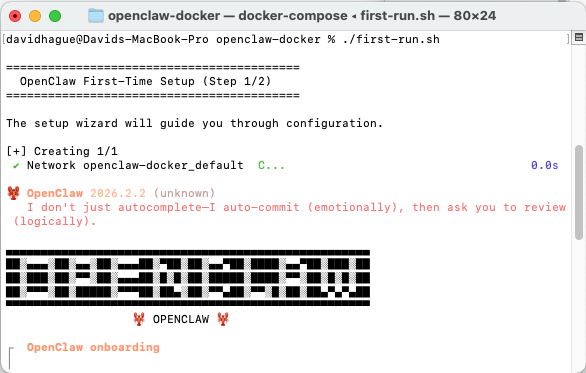
Run the Setup Wizard
Mac:
./first-run.sh
Windows:
.\first-run.ps1
The wizard will ask several questions. Here's how to answer:
| Question | What to Choose |
|---|---|
| "Understand this is powerful and risky?" | Yes |
| "Onboarding mode" | QuickStart |
| "Model/auth provider" | OpenRouter |
| "OpenRouter auth method" | OpenRouter API key |
| "Use existing OPENROUTER_API_KEY?" | Yes |
| "Default model" | Keep current |
| "Select channel" | Skip for now |
| "Configure skills now?" | No |

The setup will download several Docker container images. You'll see a list of downloads with progress bars - these are the pre-built software packages that OpenClaw needs to run (the AI engine, a database, and a web server). This is normal and may take a few minutes depending on your internet speed.
Start OpenClaw
Once the wizard completes, start OpenClaw:
Mac:
./start.sh
Windows:
.\start.ps1
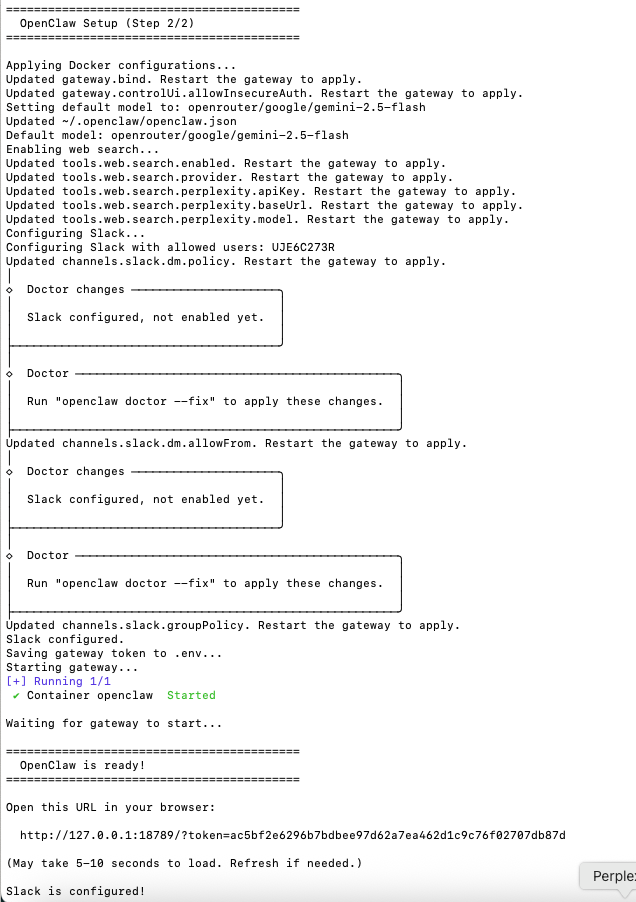
OpenClaw is now running and connected to Slack!
Start Chatting!
- Open Slack
- Look for OpenClaw in the Apps section of your sidebar
- If you don't see it, click Apps → Manage → Browse apps and search for "OpenClaw" (or the name you gave it)
- Click on the bot to start a direct message
- Say hello!
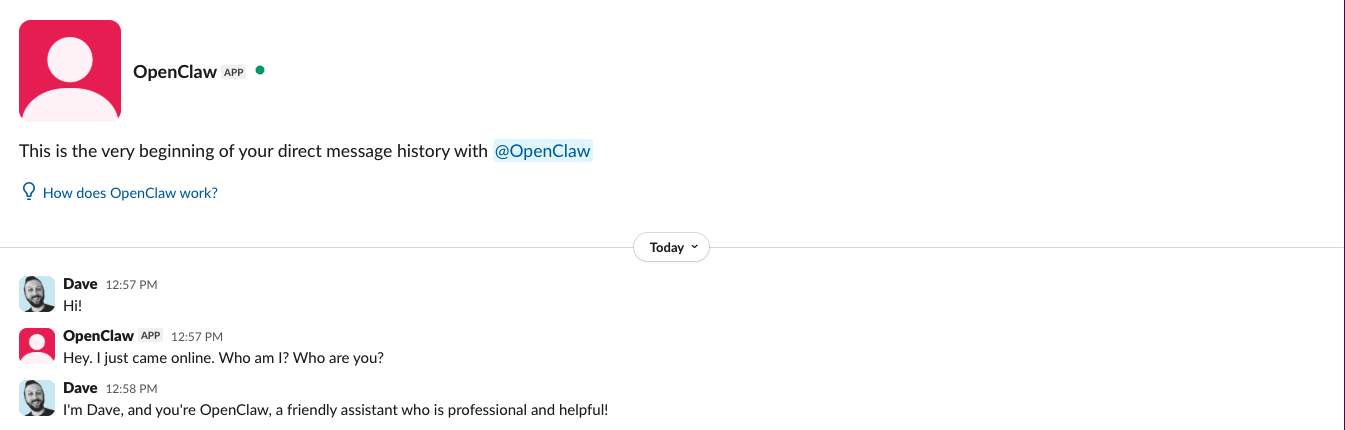
Congratulations, you now have a personal AI assistant in Slack!
Share Folders with Your AI (Optional)
By default, your AI can only access its own internal files. If you want it to work with documents on your computer (reading files, analyzing data, or helping you edit), you'll need to share specific folders.
Why Share Folders?
With folder access, your AI can:
- Read and summarize documents. "Summarize the report in my Documents folder"
- Analyze data files. "What trends do you see in this CSV?"
- Help edit files. "Add a new section to my notes"
Create the Shared Folders File
- In your
openclaw-dockerfolder, find the file calledshared-folders.txt.example - Make a copy of it and rename the copy to
shared-folders.txt - Open
shared-folders.txtin a text editor
Add Your Folders
Add the folders you want to share, one per line:
Mac example:
# Read-only (AI can read but not modify)
/Users/YourName/Documents

# Read-write (AI can read AND modify, use carefully)
/Users/YourName/Projects:rw
Windows example:
C:\Users\YourName\Documents
C:\Users\YourName\Projects:rw
Save and close the file.

Restart to Apply Changes
Mac:
./restart.sh
Windows:
.\restart.ps1
Security Note
Only share folders you're comfortable with your AI accessing. Never share:
- Password or credential files
- SSH keys or certificates
- Sensitive financial documents
When in doubt, use read-only access (no :rw suffix).
Daily Use: Quick Reference
Here are the commands you'll use to manage OpenClaw:
| What You Want to Do | Mac | Windows |
|---|---|---|
| Start OpenClaw | ./start.sh | .\start.ps1 |
| Stop OpenClaw | ./stop.sh | .\stop.ps1 |
| Restart (after config changes) | ./restart.sh | .\restart.ps1 |
| View logs | ./logs.sh | .\logs.ps1 |
| Update to latest version | ./upgrade.sh | .\upgrade.ps1 |
Remember: OpenClaw needs to be running for your Slack bot to work. By default, if you restart your computer, you'll need to run the start command again.
What's Next?
Now that your AI assistant is set up, here are some things to try:
- Ask it to search the web. "What's the latest news about topic?"
- Share a folder and ask it to summarize a document.
- Change AI models. Edit the
OPENCLAW_MODELline in.envto try Grok, Claude, GPT-4, or Gemini. - Explore skills. Check out the OpenClaw skills documentation to see available plugins.
Enjoy your new AI coworker!
This guide was my gift to you. I want everyone to be able to punch above their weight class by leveraging AI to do more with what they've got.
If this helped and you want to know how I help companies through AI consulting, mentoring, or workshops — sign up for my email list or reach out below.